|
TOC as displayed in Libronix Contents Pane. |
As displayed in MS Word document while editing. |
Styles used in MS Word. To Produce TOC. |
|
|
Heading 1 Heading 2 Heading 3 Normal Heading 3 Normal |
|
In the next few minutes you will learn the basic process for making a Libronix DLS resource using a Microsoft Word document file and the Libronix DLS Personal Book Builder Addin (PBB). Once you have completed this tutorial, you will be able to take what you have learned and apply it to making your own PBB resources from MS Word documents, as well as HTML and Open eBook files.
Helpful hints:
A two-stage process is used to create a PBB resource. The first stage is to create your original document(s) using Microsoft Word (or, an HTML editor). The second stage is to compile your original document(s) into a completed PBB resource.
Your completed resource can be as simple or complex as you choose to make it. Style and formatting capabilities in Microsoft Word and HTML are extensive and far exceed the scope of this tutorial. Instead, we will focus on several key elements that will enhance your PBB resource in the Libronix DLS.
To save you the time and trouble of creating a document file from scratch to be used with the tutorial we have provided a sample document for you to use. This sample document will be copied from this tutorial into a new MS Word document which you will create.
Position your cursor at the top of the sample text (found below).
vvvvvvvvvvvvvvv SAMPLE TEXT FOR TUTORIAL vvvvvvvvvvvvvvv
Youth Ministry Mission Statement
“To equip youth through discipleship to be witnesses of Jesus Christ, set apart from the world by their demonstration of godly character, brotherly love, and service.”
Acts 1:8; Rom. 12:2; Rom.12:10-13
GOAL #1
Youth will grow in spiritual and social maturity
2 Tim. 2:22; Eph. 4:11-16
a) Create mentoring relationships with Christian adults.
b) Participate in small accountability groups (4 -5 members) consisting of a combination of peers and elder peers.
GOAL #2
Youth will develop a holistic understanding of Scripture, and how its message of Salvation and godly living applies to their lives
1 Tim. 6:11-12
a) Study the Old Testament and the New Testament and learn about how God has been and is at work creating a holy people.
b) Help youth understand Christ’s role in God’s work of Salvation. Study the way Christ lived His life and help youth model their lives after His.
GOAL #3
Youth will become witnesses of Jesus Christ to the world and to the body of believers, by means of conduct and verbal testimony
1 Tim. 4:12
a) Study the foundations of the Christian faith so they know what they believe and why, so that they can witness verbally.
b) Take students to serve regularly at local outreach ministries such as soup kitchens or playing with street kids. This offers opportunities to witness by means of loving actions, and possibly also with words.
GOAL #4
Youth will become equipped and willing to serve the body of believers in ministry
Rom. 12:4-8 ; Heb. 6:10
a) Enable youth become comfortable leading others in Bible studies by encouraging and giving opportunities to lead small peer groups.
b) Train those who show interest in worship leading. Provide opportunities to involve these youth in worship leading of the congregation and the youth group.
^^^^^^^^^^^^^^^ END OF SAMPLE TEXT FOR TUTORIAL ^^^^^^^^^^^^^^^
The Personal Book Builder Addin allows you to customize your documents so that the resulting PBB resource utilizes the power of Libronix to the fullest extent. There are two ways in which you may ease the use (navigation, readability) of your resource: give your documents Structure and include Personal Book Builder Tags.
Providing structure to a document can greatly improve readability and navigability by the reader. Inserting standard heading styles is the method used to provide structure. Heading styles (HEADING 1 through HEADING 4) are used to mark points and sub-points within the document. HEADING 1 defines the largest heading, and HEADING 4 defines the smallest heading.
|
TOC as displayed in Libronix Contents Pane. |
As displayed in MS Word document while editing. |
Styles used in MS Word. To Produce TOC. |
|
|
Heading 1 Heading 2 Heading 3 Normal Heading 3 Normal |
|
This example (right) illustrates a document with three levels — HEADING 1 through HEADING 3. In the Contents Pane of your compiled resource, this will appear as a tree structure with Sub Heading beneath Main Heading and Point 1 and 2 beneath Sub Heading. The literal text of Point 1 and 2 (“This is my first point.”) will not show up in the Contents Pane.
The table of contents in your Libronix book is created automatically from the headings and subheadings in your MS Word document. In order for PBB to recognize your headings, they must be specifically formatted as headings in MS Word. In MS Word you can achieve this using the Styles and Formatting command. The third column of this example shows the Style commands used to produce this TOC.
See Document Structure for additional help.

Return to your MS Word document.
How to Make a Main HeadingAn author of a PBB resource has the ability to utilize the power of the Libronix DLS through the use of Personal Book Builder Tags. Personal Book Builder Tags are text tags which the creator of a document inserts into the document to perform one of two tasks: indicate a milestone or define a Libronix Link. These tags are called Milestone Tags and Link Tags, respectively. See Documemt Tags for more detailed information.
Using Personal Book Builder Tags requires a keen understanding of Data Types and Keylinking. For more information on Data Types, KeyLinking, References, Parsing and Rendering, see Data Types and Keylinking in the Libronix Digital Library System Help Manual.
Both Milestone Tags and Link Tags contain a reference. The most common form for a reference has this form: Data Type Name : Parsable Text. Data Type Name must be the name of any Libronix Data Type. Common Data Type Names are: Bible, Page and Topic. Parsable Text is any text than can be parsed using the given data type. Additional Data Type Names can be found online at http://www.logos.com/support/lbs/datatypes.
Here are some example references using this form:
|
Milestone Tags are tags which mark a specific point in your document as a milestone or Data Type reference location. For instance, when a user types “Page 1” in the reference box in your resource, the resource finds the Milestone Tag for “Page 1” and jumps to that location. Similar to Link Tags, Milestone Tags use an escape sequence so that the literal text of the tag is not visible in the document. Here is the general form of a Milestone Tag: [[@Reference]]. Refer to the Reference section for an explanation of what may be used as a Reference.
Here are some examples of Milestone Tags:
|
If you place Milestone Tags throughout the document to mark page numbers, the reader will be able to jump to any page in your PBB resource by typing a page number in the Current Reference box at the top of the resource window.
You could also create Milestone Tags that enable the reader to jump to a specific topic in your PBB resource. For example, you could insert Milestone Tags to mark the sections of your personal book that discuss “Forgiveness” or “Prayer” and this would allow your reader to type “Forgiveness” or “Prayer” in the Current Reference box and automatically jump to those sections in the resource.
Milestone Tags using Bible references allow you to mark sections of your personal resource that pertain to specific Bible references. The most common example of the use of this type of Milestone Tag is found in a Bible commentary resource where each article in the resource relates to a specific Bible reference. PBB resources created in this manner behave in a similar fashion to a commentary but not identically. Automated reports and search routines included in the Libronix DLS will not recognize a PBB resource as a commentary.

In this image (right), the resource has been created with Milestone Tags using Bible references for various articles. The active index has been set to “Bible”. The text entered into the Current Reference box ("Genesis 12:1") has brought the corresponding article into view.
See Tags for more information.
Return to your MS Word document.
How to Make a Milestone TagNote: The sample text you’re using in this tutorial is realistically too short to need Milestone Tags for pages, but we will make them for demonstration purposes.
Link Tags are a way to provide additional information to the reader of your resource by linking to relevant material inside Libronix. When a user clicks on a hyperlink created by a Link Tag, Libronix opens up the appropriate resource(s) for that given data type using a process called KeyLinking (see Data Types and KeyLinking), and jumps to the reference of the link.
Link Tags may also be used to link to a reference in a specific resource.
Here are some examples of Link Tags and how they'll appear in your resource (experiment by hovering over and clicking the example links):
|
See Tags for more information.
Return to your MS Word document.
How to Make a Basic Link TagLink Tags may also be used to link to a reference in a specific resource.

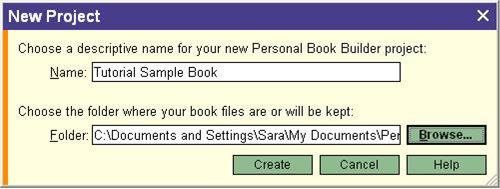
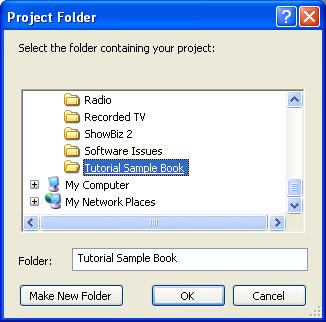
Since we're preparing to compile our document into a PBB Resource, we will create a new folder inside My Documents folder named “Tutorial Sample Book”. All of the files necessary for our completed resource will reside inside this folder as we complete the process.
Return to your MS Word document.
How to Save Your MS Word Document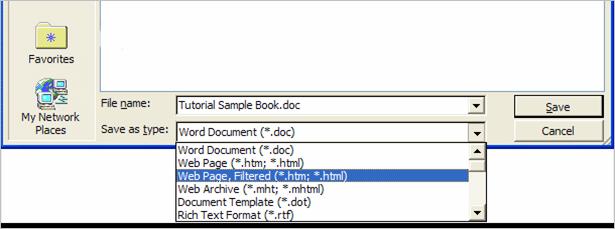
The majority of activity until now has focused on preparing a MS Word/HTML document. In Stage Two we will be primarily working within the Libronix DLS environment. The objective now is to create a PBB project that uses the MS Word/HTML document created in Stage One, supply additional information required to make a useful PBB resource, and then compile the completed PBB resource.
The New Project Dialog gathers initial information when a new project is created. For examples of how to use the New Project dialog to create resources from various sources, see the New Project section.
Return to Libronix DLS.
How to Create a New PBB Project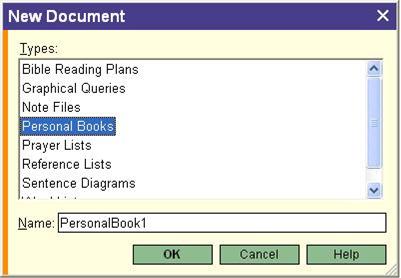
The Main Form of the Personal Book Builder provides an easy way to add and modify information about your resource. The Main Form consists of four areas: Metadata, Cover, Optional, and Book Files.
We will be working with this form in more depth shortly, if you wish to learn more about this form now, see Main Form for more information.
Using the PBB Main Form.
How to Compile Your Personal Book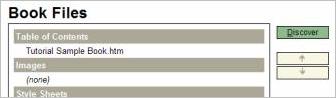
Verify that the Discover command found your MS Word/HTML document. The document name should appear under the Table of Contents heading as shown above.
Now that the document has been compiled into a resource it is a good time to review it for errors, oversights, and general appearance.
 from the resource’s tool bar to open up a window that reveals the Table of Contents for this resource. Verify that the Table of contents is correctly formed.
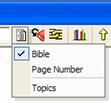 Select the Active Index icon to reveal whether all of our indexes were located. (See image at right.) Indexes are automatically created based upon the milestones we have chosen to incorporate into our document.
In most instances you will find the need to make revisions or other modifications to your work. Personal Book Builder makes it easy to revise and modify your documents whenever you choose.
Changes to the text of your resource must occur in the original document — in this case the Microsoft Word document file. Using the same procedures that were followed throughout Stage One, revisions to the text of documents should be applied to the MS Word document files and saved, then Saved As… > Web Page, Filtered (.htm,.html), and then recompiled with Personal Book Builder.
If you have discovered errors in your text document please correct them now.
In this portion of the tutorial we're going to use our existing text without alteration. We will be making changes to the PBB project to improve our completed resource.
The first revision will be to add a “cover” to the resource.

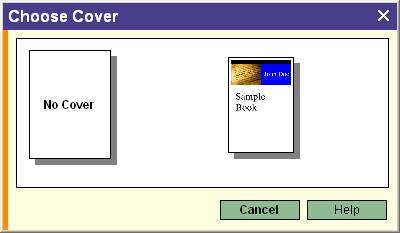
See Cover for more detailed help.
The Optional section of the Main Form provides a way of entering optional metadata into your book.
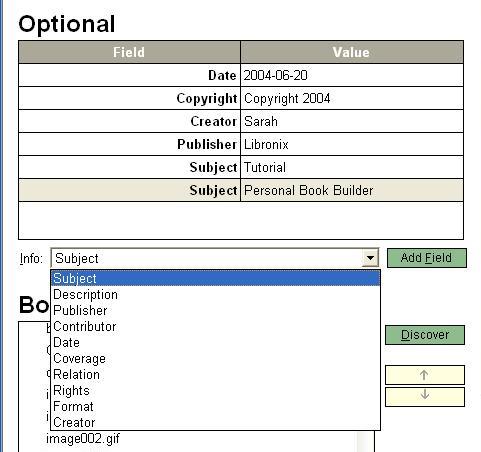
To add an additional field, select the field you would like to add from the Info dropdown box, and press Add Field.
When you have completed making the revisions described in this tutorial, left-click the Compile button. Return to the section of this tutorial titled Reviewing Your Resource. Observe the changes in metadata, your resource’s cover page, and additional Key Links that were discovered.
We hope you've found this tutorial helpful for discovering the basic operations of the Personal Book Builder. Applying the principles discussed in this tutorial to your documents will enable you to make rich resources that are fully integrated into the leading electronic library system available today.
Misplaced characters or extra spaces within the tags will create errors. If you had any problems making the sample book in this tutorial, double-check the instructions to be sure that your tags are identical to the examples shown.
This error (see right) was caused by inconsistent formatting used in one of the Bookmark Tags. The text in your Link Tag, Milestone Tags, and Bookmark Tags should all be in the same formatting (same font size and style).
If you experience an error like this, look at the error message closely. You can usually figure out by reading the error message where the problem lies. In this case, notice the word “maturity” and the mention of different fonts. Libronix saw this Bookmark Tag in the text [[Maturity|link.pos=LLS-AOL%3A37124.0.0|ref=topic%2Btopics.maturity|res=LLS%3A46.10.2]] and wasn't able to make it into a functioning Bookmark Tag because of the different font styles and sizes within the tag (notice that part of the text is in Arial 10pt font and part is in Bookman Old Style 12pt font).
 Note: Red text only indicates an error if it starts with the word "Error." If you see text like this (see right), it means that Libronix has correctly recognized certain data types in your document. This is not an error.
You can easily do this by moving or copying the additional MS Word/HTML files into the folder where the other files for your personal Libronix book are stored. (When you made the Tutorial Sample Book, the path to this folder was My Documents > Tutorial Sample Book.) Then left-click the Discover button in the Personal Book Builder Window and Libronix will automatically add your new MS Word/HTML files to your personal book when it compiles again.
Usually this is because you must discover the new file before it will appear in your personal Libronix book. Go to the Personal Book Builder Window for the personal Libronix book you’re currently working on. Left-click on the Discover button. Now left-click the Compile button again and the graphic should appear.
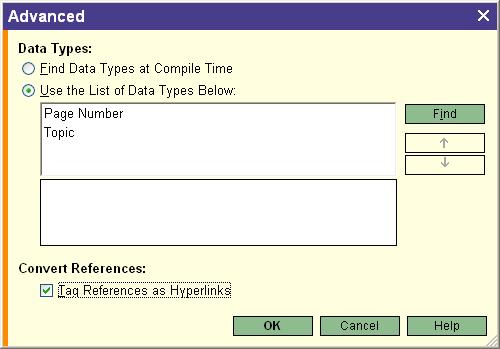
In the Personal Book Builder window, left-click on the Advanced… button. This brings up the Advanced dialog box. Near the bottom of this dialog box you’ll see a checkbox with the words, “Tag References as Hyperlinks.” Make sure this box is checked, and left-click the OK button. Now all your Bible references will automatically become Link Tags.
First, save your MS Word document again as Web Page, Filtered (.htm .html). Then go back to the Personal Book Builder window in Libronix and left-click the Compile button. Your personal Libronix book should reflect the changes.
If Libronix cannot locate your MS Word document at all (if the name of your MS Word/HTML document does not appear under the Book Files section of the Personal Book Builder window) then your MS Word/HTML document is not in the right folder. Using Windows Explorer or My Documents, locate your MS Word/HTML document and move it into the project folder where all the files for your personal Libronix book are kept
Tutorial is part of the Personal Book Builder addin.