Today’s post is from Morris Proctor, certified and authorized trainer for Logos Bible Software. Morris, who has trained thousands of Logos users at his two-day Camp Logos seminars, provides many training materials.
The Tools menu houses a variety of Logos features, each of which opens a certain way on the Logos desktop. For example:
- Passage Analysis opens in a floating window.
- Collections opens in a typical panel.
- History opens in a “locked” panel.
It’s the locked panel I want to discuss with you, because if you’re not aware of this little trick, resizing can be challenging.
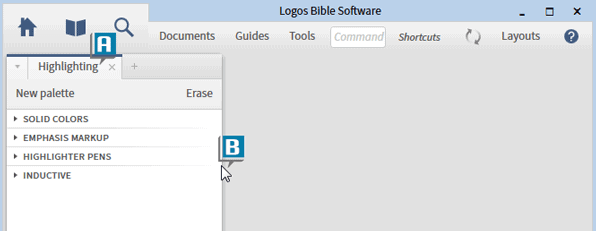
- Choose Tools | Highlighting.
- Notice that the Highlighting panel locks into place on the left side of the screen (A).
When you place your cursor on the border line of the panel, you’ll notice that you can’t resize like you can a typical panel (B). (You can drag the Highlighting tab to reposition the panel, but that doesn’t resize it the way we want.)
So try this:
- Close the Highlighting panel.
- Choose the Tools menu again.
- Click and hold Highlighting.
- Drag Highlighting around the Logos desktop.
- Notice how different portions of the desktop highlight in blue (C).

- Release the mouse.
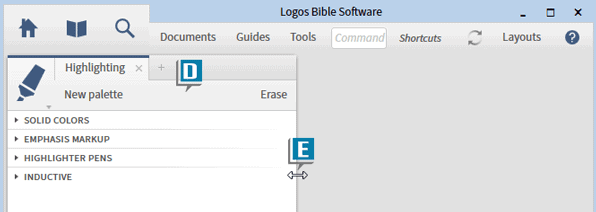
- Notice that the blue area becomes a typical panel housing Highlighting (D).
You can now easily resize the Highlighting panel, because it’s not locked into place (E).
Try dragging other features on the Tools menu, such as History, Information, Bible Facts, or Power Lookup. I think you’ll enjoy the flexibility that dragging provides!