A couple of weeks ago I showed you how to free up some hard drive space by deleting duplicate resources. There’s another way to make even more space available: deleting locked resources.
Searching Locked Resources
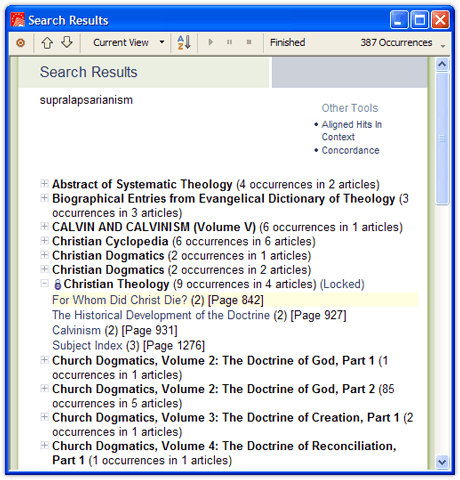
Now, before I show you how to do that, I should tell you that there is actually a very good reason for keeping locked resources on your hard drive. You may not know this, but you can actually search the contents of locked resources as well. Libronix will even give you the page numbers where the hits for your search occur!
This is helpful for two reasons:
- If you have the book in print, you can pull it off your shelf and find exactly what you’re looking for—far more powerful and far easier to use than typical indexes, which the print book may not even have.
- You may find other resources that you don’t have in Libronix or in print that deal with a topic or passage that you’re studying that you might want to add to your library.
But if you don’t plan to search your locked resources and need to free up some space, you may want to delete them.
Do You Have Locked Resources?
To find out if you have locked resources on your computer, open My Library and select “All Locked Resources” under the “Collection” drop-down.
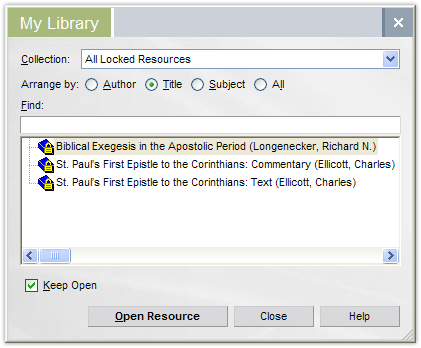
Locked resources have a yellow padlock over the book icon.
How Can You Delete Them?
There are two methods for deleting locked resources.
Method 1
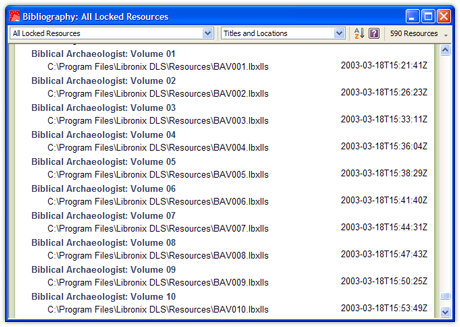
If you have a smaller number of locked resources, you could run a Bibliography report (Tools > Library Management > Bibliography) and set it to “All Locked Resources” and “Titles and Locations” to find the file names and locations for all of your locked resources. You could then open your resources folder (e.g., C:Program FilesLibronix DLSResources) and manually delete the locked resources you no longer want. (You may need to close Libronix in order to delete them.)
Method 2
If you have a larger number of locked resources, you may want to try this method. It does require that you have some free space, and it does take some time to run.
NOTE: This method is recommended only for advanced users.
- Open the Location Manager (Tools > Library Management > Location Manager) and select “Unlocked on Local Drives.” Enter a new destination that doesn’t have any files in it (e.g., C:Program FilesLibronix DLSResourcesUnlocked). If the folder doesn’t exist, Libronix will automatically create it. After Libronix is done generating the list of resource, click “Copy Resources.” Libronix will copy all unlocked resources to your new folder. Be patient. It may take some time. Wait until it is completely done before proceeding.
- Manually delete all of the resources from your original resources folder, since it contains locked and unlocked resources. To do this, open your resources folder in Windows Explorer and select all of the resources. If your new resources folder is a subfolder of your original resources folder, make sure not to delete it or any other folders (e.g., Media). Delete only the .lbxlls files.
- Move all of the resources from your new resources folder back to your original resources folder and delete the new resources folder.
- Start Libronix and open My Library. If any of your unlocked resources are grayed out, that means that you deleted some unlocked resources as well. Don’t worry. You can restore them from your Recycle Bin. If you don’t see any grayed out unlocked resources, you can proceed to Refresh Resources (Tools > Option > General > Resource Paths). All locked resources should now be gone.
Enjoy your extra space!